Steelcase Cubicle Disassembly Instructions: A Comprehensive Plan
Navigating Steelcase cubicle disassembly requires a systematic approach‚ prioritizing safety and organization. This guide offers detailed steps‚ ensuring a smooth process for office relocation or reconfiguration.
Utilizing WhatsApp Web for communication during the project can streamline coordination among team members‚ facilitating efficient task management and quick problem-solving.
Remember to document each step‚ labeling components for easier reassembly‚ and adhering to responsible disposal practices for a sustainable outcome.
Safety First: Preparation & Tools
Prior to commencing Steelcase cubicle disassembly‚ a thorough safety assessment is paramount. Ensure the workspace is clear of obstructions and personnel not directly involved in the process. Wear appropriate personal protective equipment (PPE)‚ including safety glasses‚ gloves‚ and closed-toe shoes‚ to mitigate potential hazards like sharp edges or falling components.
Gather the necessary tools: a variety of screwdrivers (Phillips head‚ flathead)‚ Allen wrenches (metric and standard)‚ a rubber mallet‚ a utility knife‚ and potentially a power drill with appropriate bits. Having a label maker or masking tape and permanent markers is crucial for component identification. Consider using furniture sliders to protect flooring during panel movement.
Disconnect all electrical components before beginning disassembly. Utilize WhatsApp Web for quick communication regarding power-down confirmations and safety checks. Inspect all tools for damage before use. Be mindful of lifting heavy objects – employ proper lifting techniques or seek assistance. A well-prepared and cautious approach minimizes risks and ensures a safe disassembly process.
Identifying Your Steelcase Cubicle System
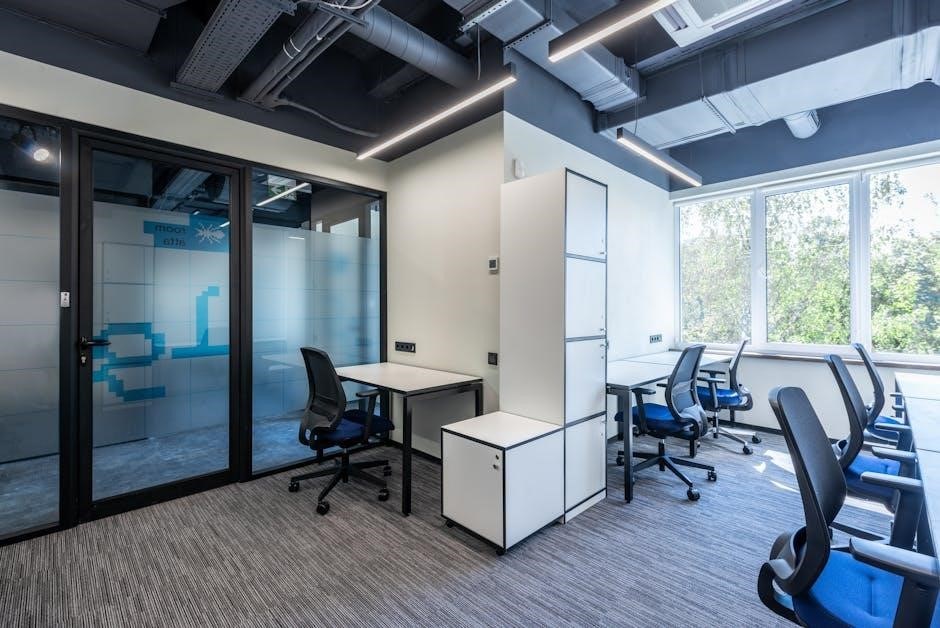
Accurate identification of your specific Steelcase cubicle system is the foundational step for successful disassembly. Steelcase has produced numerous series over the years‚ each with unique construction methods and hardware. Common series include Series 1‚ Series 2‚ Avenue Lite‚ and more recent offerings like Steelcase Flex.
Locate any identifying labels or markings on the panels‚ worksurfaces‚ or support structures. These labels often contain series numbers or model names. Examine the panel connection methods – are they bolted‚ clipped‚ or utilize a proprietary locking system? Observe the edge banding material (fabric‚ laminate‚ or glass) as this can indicate the series.
Utilizing online resources‚ such as the Steelcase website or online forums‚ can aid in identification if physical labels are missing. Sharing photos of your cubicles via WhatsApp Web with colleagues or experts can expedite the process. Understanding your system’s specific characteristics will dictate the appropriate disassembly techniques and prevent damage during the process. Accurate identification is key to a smooth and efficient takedown.
Understanding Panel Types (Fabric‚ Laminate‚ Glass)
Steelcase cubicle panels come in various materials‚ each requiring a slightly different approach during disassembly. Fabric-covered panels typically attach with clips or bolts hidden beneath the fabric‚ demanding careful prying or unscrewing to avoid tearing. Laminate panels often utilize a more robust bolted connection system‚ requiring appropriate tools and attention to avoid scratching the surface.
Glass panels present unique considerations due to their fragility. These usually involve specialized clamping mechanisms or silicone seals. Handle glass panels with extreme caution‚ wearing gloves and eye protection. Avoid applying excessive force during removal‚ as breakage can occur.
Communicating panel material types via WhatsApp Web to the disassembly team ensures everyone understands the necessary precautions. Knowing the material composition informs the selection of appropriate tools – plastic pry tools for fabric‚ screwdrivers for laminate‚ and suction cups for glass. Proper identification and handling prevent damage and ensure a safe disassembly process. Remember to inspect each panel before applying force.
Disconnecting Electrical Components
Prior to any physical disassembly‚ meticulously disconnect all electrical components within the Steelcase cubicle. This includes power cables‚ network cables (Ethernet‚ phone)‚ and any integrated lighting or power strips. Always verify power is OFF at the source – circuit breaker – before handling any wiring. Use a cable tracer if necessary to identify live wires.
Carefully unplug devices and label each cable clearly with its original connection point. Utilize WhatsApp Web to share photos of cable arrangements with the team‚ ensuring accurate reconnection during reassembly. Avoid simply yanking cables; gently detach connectors to prevent damage.
Inspect all wiring for wear and tear‚ documenting any issues. Consider taking detailed photographs of the electrical setup before disconnection. Proper disconnection minimizes the risk of electrical shock and damage to equipment. Remember safety is paramount; if unsure‚ consult a qualified electrician. Document everything for a smooth reinstallation.
Removing Cubicle Panels – General Techniques
Begin panel removal by identifying the connection points – typically clamps‚ brackets‚ or interlocking mechanisms. Loosen these fasteners carefully‚ avoiding excessive force that could damage the panels or surrounding structures. Utilize appropriate tools‚ such as Allen wrenches or screwdrivers‚ ensuring a proper fit to prevent stripping screws.
For fabric-covered panels‚ be mindful of the fabric’s delicate nature; avoid snagging or tearing. Employ a gentle lifting technique‚ supporting the panel’s weight to prevent strain on the connections. Communicate via WhatsApp Web with team members to coordinate lifting and maneuvering‚ especially for larger panels.
Once fasteners are loosened‚ gently slide or lift the panel away from the supporting structure. Inspect the connection area for any remaining hardware. Label each panel immediately with its original location for simplified reassembly. Prioritize a methodical approach‚ working systematically to avoid confusion and ensure a safe‚ efficient removal process.
Disassembling Steelcase Panel Supports & Bases
Start by locating the fasteners securing the panel supports to the bases – these are often bolts or screws concealed within the base structure. Utilize the correct tools to avoid damaging the hardware or the base itself. Communicate progress and any challenges encountered via WhatsApp Web for quick team support.
Carefully remove the fasteners‚ supporting the panel support as it becomes detached. Note the orientation of the supports and any associated hardware‚ as this will be crucial during reassembly. Inspect the base for any integrated wiring or electrical components before proceeding further.
Once the supports are removed‚ disassemble the base itself‚ if necessary. This may involve separating sections or removing leveling feet. Label all components clearly‚ indicating their position and function. Ensure a safe and organized workspace to prevent loss of parts and facilitate efficient reassembly. Prioritize methodical disassembly for a streamlined process.
Removing Steelcase Worksurfaces (Desks)
Begin by clearing the entire workspace of all personal belongings‚ equipment‚ and any loose items. Disconnect all power cords‚ network cables‚ and any other connections to the desk. Utilize WhatsApp Web to quickly confirm disconnection with IT or relevant personnel; Locate the fasteners securing the worksurface to the supporting structure – typically bolts or screws.
Carefully remove these fasteners‚ supporting the worksurface to prevent it from falling. Consider having a second person assist with this step‚ especially for larger desks. Once detached‚ gently lift the worksurface and move it to a safe‚ designated area. Inspect the supporting structure for any remaining connections or hardware.
If the worksurface is modular‚ disassemble it into smaller components for easier handling and transport. Label each component clearly‚ noting its position and orientation. Ensure proper lifting techniques are employed to avoid injury. A systematic approach ensures a safe and efficient removal process.
Detaching Steelcase Storage Units (Pedestals‚ Shelves)
Prior to detaching any storage units‚ completely empty all drawers‚ shelves‚ and compartments. Confirm removal of all contents to prevent damage or injury. Utilize WhatsApp Web for quick communication regarding access to shared storage or disposal instructions. Identify the method of attachment – pedestals often bolt to the worksurface or floor‚ while shelves may utilize brackets or clips.
For bolted pedestals‚ carefully remove the bolts‚ supporting the unit as it becomes free. Be mindful of the weight‚ and enlist assistance if needed. Shelves typically detach by releasing the securing hardware; gently pull or unclip them from their mounts. Inspect for any hidden fasteners or connections before attempting removal.

Label each component – drawers‚ shelves‚ frames – for easy reassembly. Protect delicate surfaces during transport with blankets or padding. Ensure proper lifting techniques are used to avoid strain. A methodical approach minimizes risk and streamlines the disassembly process.
Specific Instructions: Series 1 Cubicles

Steelcase Series 1 cubicles are characterized by their modular design and relatively straightforward disassembly. Begin by disconnecting any electrical components supplying power to the workstation – always prioritize safety. Utilize WhatsApp Web to coordinate with colleagues regarding power-down procedures and potential disruptions.
Panels in Series 1 systems typically connect via a cam-lock system. Locate the cam locks‚ usually near the panel edges‚ and rotate them to release the connection. Support the panel as it’s released to prevent damage. Worksurfaces are generally supported by T-shaped legs or pedestals; detach these first before attempting to move the surface.
Pay close attention to the panel supports; they often have specific locking mechanisms. Label all components meticulously – panels‚ supports‚ worksurfaces – to simplify reassembly. Remember to carefully inspect all connections before applying force. A systematic approach ensures a smooth and efficient disassembly process for Series 1 cubicles.
Specific Instructions: Series 2 Cubicles
Steelcase Series 2 cubicles present a slightly more complex disassembly due to their enhanced connectivity features. Prior to starting‚ ensure all electrical connections are safely disconnected and communicate this via a platform like WhatsApp Web for team awareness. These systems often utilize a combination of cam locks and snap-fit connectors.

Panel removal requires identifying and releasing these connectors. Carefully examine the panel joints for hidden release points. The worksurfaces in Series 2 are frequently supported by a pedestal or leg system with integrated cable management. Disconnect all cables before detaching the support structure.
Series 2 panels may also incorporate internal bracing; be mindful of these when separating panels to avoid damage. Thorough labeling of all components – panels‚ supports‚ hardware – is crucial for efficient reassembly. Remember to document the orientation of each piece. A methodical approach will streamline the Series 2 disassembly process.
Specific Instructions: Avenue Lite Cubicles
Avenue Lite cubicles‚ known for their streamlined design‚ generally offer a relatively straightforward disassembly process. However‚ attention to detail remains paramount. Utilize communication tools like WhatsApp Web to coordinate tasks and share observations during the process‚ ensuring everyone is informed.
These systems primarily rely on a modular connection system‚ featuring interlocking panels and minimal exposed hardware. Begin by locating and releasing the panel connectors‚ often accessible from the top or sides. The worksurfaces typically attach with a few strategically placed bolts or cam locks – document their locations before removal.
Avenue Lite panels are often lighter than other Steelcase series‚ but still require careful handling to prevent scratches or damage. Pay close attention to any integrated power or data ports‚ ensuring they are fully disconnected before panel separation. Detailed labeling of components is essential for a smooth reassembly‚ referencing original configurations;

Dealing with Shared Panels & Connecting Hardware
Shared panels present a unique challenge during Steelcase cubicle disassembly‚ requiring careful coordination to avoid disrupting adjacent workstations. Communication via platforms like WhatsApp Web can be invaluable for informing colleagues of planned disruptions and ensuring minimal interference.
Identifying the connecting hardware is crucial. These often include specialized bolts‚ clips‚ or interlocking mechanisms designed for stability and modularity. Before attempting removal‚ thoroughly inspect the connection points to understand the release mechanism. Avoid forceful disassembly‚ as this can damage the panels or hardware.

When disconnecting shared panels‚ support the adjacent sections to prevent shifting or collapse. Document the order of disassembly and the type of hardware used at each connection point. Proper labeling of all components‚ including shared hardware‚ is essential for efficient reassembly and maintaining structural integrity. Remember to prioritize safety throughout the process.
Labeling & Inventory for Reassembly
A meticulous labeling system is paramount during Steelcase cubicle disassembly‚ ensuring a streamlined reassembly process. Utilize numbered labels or color-coded tags to identify each panel‚ support‚ and component. Consider using WhatsApp Web to share photos of labeled parts with the reassembly team for clarity.

Create a detailed inventory list‚ cross-referencing labels with component descriptions and quantities. Include specifics like panel dimensions‚ fabric color‚ and hardware types. This inventory should be digital‚ allowing for easy updates and sharing. Photograph each disassembled section before complete removal‚ providing a visual reference for reassembly.
Organize hardware – bolts‚ screws‚ clips – into labeled containers‚ corresponding to the inventory list. Separate different types of hardware to avoid confusion. A well-maintained inventory and labeling system will significantly reduce reassembly time and minimize errors‚ ultimately saving time and resources. Prioritize accuracy and completeness in your documentation.
Proper Disposal & Recycling of Cubicle Components

Responsible disposal of Steelcase cubicle components is crucial for environmental sustainability; Prioritize recycling materials whenever possible‚ diverting waste from landfills. Contact local recycling centers to determine accepted materials – often including steel‚ aluminum‚ and certain plastics.
Steelcase frequently offers take-back programs or partners with recycling facilities. Investigate these options for convenient and environmentally sound disposal. Fabric panels may require specialized recycling due to material composition; explore textile recycling options. Utilize WhatsApp Web to quickly locate nearby recycling facilities and their guidelines.
For components unsuitable for recycling‚ explore donation opportunities to schools‚ non-profits‚ or community organizations. Properly dismantle components to separate materials for efficient recycling. Adhering to local regulations regarding waste disposal is essential. Document all disposal and recycling efforts for compliance and sustainability reporting.
Troubleshooting Common Disassembly Issues
Encountering stubborn fasteners is common during Steelcase cubicle disassembly. Utilize penetrating oil to loosen screws and bolts‚ allowing ample time for absorption. If a screw head is stripped‚ employ a screw extractor tool to prevent further damage. Panels may resist removal due to hidden connectors; carefully inspect for latches or clips.
Electrical components present potential challenges. Always disconnect power before handling wiring‚ and clearly label all connections for reassembly. If unsure about electrical work‚ consult a qualified electrician. Communication via WhatsApp Web can facilitate quick consultations with colleagues or experts.
Stuck or jammed panels often require gentle persuasion. Avoid excessive force‚ which can cause damage. Check for obstructions and carefully maneuver the panel to release it. Document any persistent issues and seek assistance if needed. Remember‚ patience and a systematic approach are key to resolving disassembly challenges.